Air Dry Clay Tiles and Elements for Mosaic Art with Carol Shelkin
Create fun and colorful tiles and inclusions for your mosaics
Watch Promo Enroll in Course
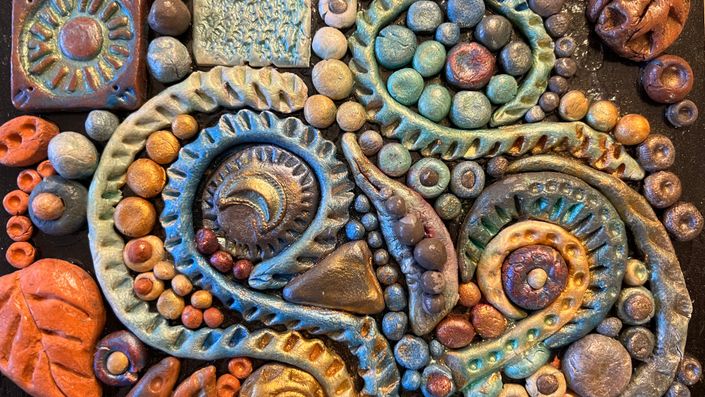
Have you wondered what it would be like to add “ceramic like” pieces to your mosaics, but you do not have access to a kiln? Are you curious about how to make unique tesserae in a short period of time for inclusion in indoor displayed mosaic art projects?
Now you can do this with Carol Shelkin’s tried and true methods of creating air-dry clay tiles and design elements for your mosaic art projects. You will be able to create unique elements and tiles anytime and anywhere. The techniques taught in this course, combined with your creative voice and style, will allow you to sculpt and manipulate the clay into a variety of shapes and sizes.
In this course you will learn:
- Carol’s favorite air-dry clay
- How to create unique stamps
- How to shave the clay for a bas-relief effect
- How to make small sculptures and 3D effects with a few pottery tools
- How to use textured items to add dimension to the clay
- How to use molds and other common items to create embellishments
- How to color the clay with mica powders and acrylic paints
- How to adhere the tiles and elements to the substrates
- Carol’s method for curing the clay tiles and elements
- Carol’s favorite sealants
- How to create a cohesive composition with the clay tiles and design elements
Through the use of air-dry clay you will find a new freedom for making tiles, design elements, and mosaic inclusions without the need for a kiln. Carol demonstrates how to create a variety of shapes and how to color them. Although there isn’t any mosaic instruction in this course, once you have the knowledge for making your own air-dry clay elements, the sky's the limit on what you can add to your art projects.
As you follow along with Carol, she will demonstrate multiple ways to use this clay in both white and terracotta. This will allow you to make pieces that can be colored and sealed for any of your indoor mosaic art projects.
Included in this course is a PDF for download with all the tools, materials, and resources.
Your Instructor

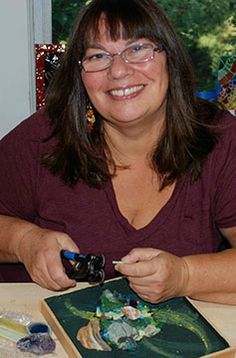
Carol Shelkin took to art as soon as she was able to hold a crayon. At seven she started attending Fleisher Art Memorial in Philadelphia and it was made clear at this young age that her life would be centered on her passion for art. She continued her artistic direction with studies at Pennsylvania Academy of The Fine Arts and studies in Ravenna, Italy. In time she began to teach and create one-of-a-kind works of art that are displayed in galleries, community centers, libraries, commercial and private, residential settings.
For over 30 years Carol owned a successful arts nursery school, "Carol's House” in Philadelphia, raised her three children along with her husband, JP as she balanced her promise to teach adults at night and work on her personal portfolio in art.
Since 2011, Carol is the owner of Worldwide Mosaic Workshops and Tours taking creatives and art lovers to Costa Rica, Mexico, France, Morocco, Italy and Spain. She is the instructor and tour guide traveling the world, exploring and researching new destinations, and delivering experiences that students will remember for the rest of their lives. Carol also offers other week long and weekend workshops worldwide.
The Pennsylvania Council on the Arts, Upper Darby Arts and the prestigious Robin Brett Mosaic Scholarship from The Society of American Mosaic Artists honored her with grants and scholarships to create and learn. She is a Founding Member and past President of The Mosaic Society of Philadelphia along with being voted a Master Artisan from The Pennsylvania Guild of Craftsmen.
Carol finds a very eclectic approach to surface design placing stained glass and other materials where she, as a painter naturally places paint and balances that with her love of being an art teacher.
Course Curriculum
-
StartIntro and personal interview with Carol and Tami (5:12)
-
StartPDF for download: Suggested tools, materials, and resources
-
StartAir dry clay power point presentation (2:54)
-
StartOverview of what you will create in this course (3:18)
-
StartCreating stamps with the clay (5:45)
-
StartMaking tiles and strands with the clay (7:08)
-
StartMore advantages to air dry clay (2:08)
-
StartSubstrate choices and how to properly fit the tiles (3:00)
-
StartAdding design details to the tiles (7:18)
-
StartBas relief technique on the clay tiles (8:47)
-
StartColoring the clay (2:42)
-
StartColoring with mica powders on the clay tiles (8:05)
-
StartColoring with acrylic paints on the clay tiles (5:24)
-
StartSuggested sealants for the air dry clay pieces (1:26)
-
StartSculpey sealant (2:24)
-
StartHow to mix and dry the clay (1:25)
-
StartDemonstration of mixing the clay and how to use a mold (4:03)
-
StartCarol's tips and tricks for creating a project with the air dry clay tiles and inclusions (10:43)
-
StartCreating a composition with the clay tiles and other elements (5:31)
-
StartPainting the tiles and other elements (5:13)
-
StartTouch ups and dry laying the composition (7:24)
-
StartGluing the composition to the substrate (9:58)
-
StartHow to fix broken tiles and other creative ideas (6:15)
-
StartSpray sealant demo (0:48)
-
StartWrap up and thank you! (2:49)