Garden Mosaic for any Climate with Jennifer Kuhns
Lasting Beauty for your Landscape
Watch Promo Enroll in Course
Have you always wanted to upgrade the beauty of your garden or outdoor space with mosaic art but were not sure how? Have you wanted to create something that can add a little beauty and sparkle that will last forever? If you answered “yes” to either of these questions, we have the online course for you.
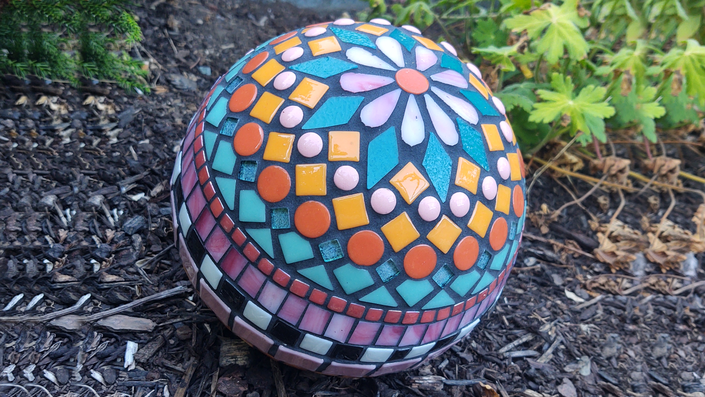
Jennifer Kuhns has brought her skills and talents to Mosaic Arts Online with her course “Garden Mosaic for Any Climate.” Jennifer has been creating mosaic art for over 20 years. She creates everything from beautiful stepping stones to large scale interior and exterior installations. In this course Jennifer will demonstrate many of her techniques on both a concrete stepping stone and a thin set covered polystyrene sphere.
In this online course you will learn:
- The best substrates for exterior mosaics.
- How to work on a round sphere and a flat surface
- How create a simple design for each project
- The best glass choices for each project
- Basic precision cutting techniques using stained glass
- The best adhesive for each project
- Jennifer’s preferred method for grouting both projects, including tinting the grout
- BONUS: How to quickly create an exterior sphere with polystyrene and thin set
This is a great course for anyone learning to create exterior mosaic art. In addition to watching Jennifer work in real time as she creates both the stepping stone and gazing ball, she will also share important technical information for long lasting exterior mosaics.
This course includes a PDF for download of all the suggested tools, materials, and resources.

Your Instructor

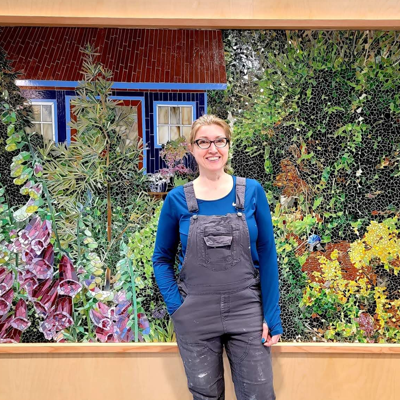
Jennifer Kuhns has been creating fine art mosaics since 2001. Her award winning work ranges from strikingly realistic to decorative, highly-designed mosaic installations. She has been featured in many exhibits and galleries throughout the country, and works primarily with stained glass, carefully shaping each piece for assemblage into stylized, exquisite mosaic art. Her public art and community projects demonstrate a rare ability to engage, educate and create community with all ages and socio-economic groups. Jennifer lives and works on a small farm in rural Western WA where she creates custom mosaics for private, corporate and public spaces.
Course Curriculum
-
StartIntroduction and Personal Interview with Jennifer and Tami (7:32)
-
StartPDF for download. Suggested tools, materials, and resources
-
StartIntroduction of the stepping stone (1:31)
-
StartOverview of the tools and materials (1:49)
-
StartScratch coat with thin set/mortar (3:06)
-
StartLaying on the scratch coat (2:27)
-
StartDrawing the design (6:34)
-
StartStarting the mosaic in the center (5:54)
-
StartIntro to tools for cutting stained glass (9:23)
-
StartSimple techniques for precision cutting in stained glass (4:20)
-
StartAdding square tiles as design elements (4:17)
-
StartAdding more details with colors and shapes (4:36)
-
StartMore tips and tricks for cutting shapes of stained glass (4:34)
-
StartAdjusting shapes to fit the design (3:25)
-
StartDrawing and cutting final row of the design (5:59)
-
StartJenn shares more details about exterior mosaics (2:34)
-
StartIntro to grouting (1:08)
-
StartHow to mix the grout with black pigment (6:47)
-
StartStep 1: Applying the grout (5:26)
-
StartStep 2: First pass of cleaning off the grout (6:18)
-
StartStep 3: Final cleaning off of the grout (3:37)
-
StartCompleted mosaic on concrete paver (1:40)
-
StartIntroduction to the exterior gazing ball, tools, and materials. (2:01)
-
StartBegin mosaic design at the top center (7:02)
-
StartEco accent tiles work well on curved substrates (3:12)
-
StartAdjusting tiles to fit proportionately (2:50)
-
StartCutting stained glass shapes for the curved substrate (6:52)
-
StartContinuation of applying stained glass to the gazing ball (2:50)
-
StartTips and tricks for using different heights of tesserae (3:04)
-
StartAltering the glass shapes to fill in the final space (3:09)
-
StartStep 1: Intro to grouting the bottom of the gazing ball (4:38)
-
StartStep 2: Grouting process on bottom of the gazing ball (3:42)
-
StartStep 3: Cleaning grout off bottom of gazing ball (1:48)
-
StartGrouting the top of the gazing ball (9:56)
-
StartFinal grout cleaning of top side of gazing ball (3:40)
-
StartBasic demo of indirect method for pouring a mold (7:37)
-
StartRemove mosaic from indirect method mold (2:14)
-
StartFinal cleaning on top of gazing ball (4:42)
-
StartWrap Up and Thank You (0:21)
-
StartBONUS: Basic demonstration to create a thin set/mortar polystyrene sphere (10:18)