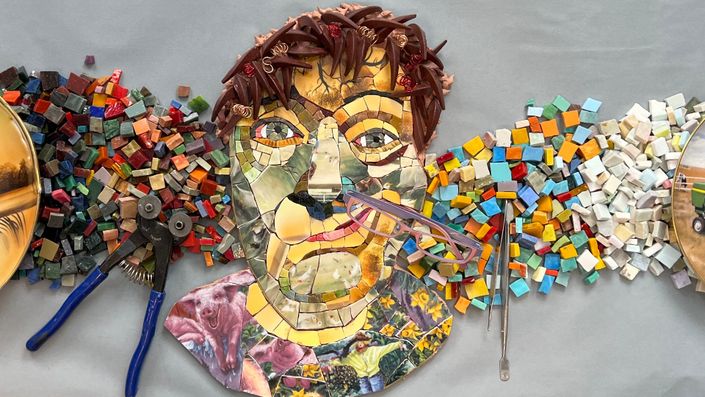
Contemporary Portraiture in Smalti and Picassiette with Gila Rayberg
A Picture is Worth a Thousand Pieces
Watch Promo Enroll in Course
Do you have a passion for learning how to create portraits in mosaic art? Would you love to learn specific techniques from an artist who has studied at the Scuola Mosaicisti del Fruili in Spilimbergo, Italy? We have invited Gila Rayberg to teach her take on using smalti and picassiette (broken plates) for creating one-of-a-kind contemporary portraits. These can be displayed as cut out stand alone pieces or with a mosaic background. If you know anything about Gila, she is a portrait aficionado with a very unique style that gives each piece she creates a special personality and incredible expression.
You will watch in real time as Gila creates one contemporary portrait from beginning to end while using her knowledge and wisdom. This in-depth course is full of demonstrations of her signature techniques. Her use of both smalti and picassiette will allow you to see the endless possibilities for creating these portraits with expression and personality.
In this course you will learn:
- How to choose a reference photo
- How to transfer the photo to a plastic surface
- How to choose a tonal color palette
- How to mix tinted mortar
- How to create a portrait with expression
- How to use plates with images for specific facial features
- How to create shadows and highlights
- How to make a mortar and mesh substrate
- How to transfer the mosaic to the new substrate
- How to work directly with mixed media materials while adding texture and dimension
- How to cut out the mosaic for a stand alone piece (no background)
- How to add reinforcement and hanging hardware to finish the piece
Included in this course is a PDF for download with the suggested tools, materials, and resources. You will also have access to the referernce photo used in the course if you would like to learn with this image.
I learned so many of the bits I needed to know and your naturalness with the process took any anxiety out of it.
You have really supported me giving my creativity free reign. Now I feel ready to get started!
Tami, thanks so much for commissioning this. I'm getting so much from MAO I really appreciate it." Jo S.
Your Instructor

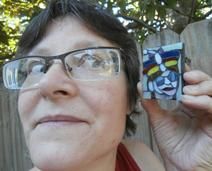
Gila Rayberg arrived at the visual arts after a successful career as a freelance musician and educator. Allowing her strong sense of intuition and love of experimentation to guide her, Gila has developed a unique voice in the realm of mosaic portraiture.
After earning her masters degree in music from Arizona State University (1989), Gila moved to San Francisco and quickly became involved with a community of improvisational musicians, composers and artists.
Pursuing her love of travel, Gila found herself performing & teaching instrumental music at a newly established University in Borneo, East Malaysia. From there, she traveled extensively throughout South East Asia, Hong Kong, China, India, Israel & Egypt, collecting art, textiles, and musical instruments, representative of local cultures. With each excursion Gila became increasingly fascinated by the indigenous art which surrounded her.
On her return to the United States, Gila landed in New Orleans, spending her first year practicing jazz standards on the street for tips. She then joined the horn section of Deacon John & the Ivories which kept her gigging steadily until hurricane Katrina hit in 2005. At that point, Gila turned her focus to creating mosaic art full time.
In recent years, Gila's work has been exhibited around the US, winning numerous awards for her expressive and whimsical portraits. Her work resides in private collections internationally & has been published in a number of books.
Course Curriculum
-
PreviewIntro and personal interview with Gila and Tami (7:11)
-
StartPDF for download. Suggested tools, materials, and resources. Tints for purchase. Reference image for download.
-
StartExamples of Gila's Contemporary Portraits in Smalti and Picassiette (0:25)
-
StartChoosing a reference (0:53)
-
StartTaping down your reference photo (1:29)
-
StartTracing image onto plastic (4:57)
-
StartRemoving original reference under the plastic (2:51)
-
StartOrganizing smalti into tonal mixes (2:32)
-
StartLooking at tonal variation in your reference image (2:23)
-
StartChoosing picassiette plates & matching smalti (4:19)
-
StartTools & breaking down dishes (13:36)
-
StartCutting smalti (3:20)
-
StartEverything you’ll need - more tools (1:39)
-
StartMixing tinted thin-set mortar (2:51)
-
StartAbout working on plastic - why? (1:34)
-
StartStarting the portrait - the eyes first (9:48)
-
StartKey-stoning lesson: cutting around an arc/circle (3:08)
-
StartBack to the eye (9:38)
-
StartFinishing the 1st eye (10:50)
-
StartThe second eye (9:52)
-
StartThe nose (11:14)
-
StartMore nose (11:22)
-
StartInto the cheek and under the eye (20:04)
-
StartClean-up tips (2:42)
-
StartSilicone cups (0:56)
-
StartWorking around top of the eye (11:03)
-
StartNow on to the right cheek (13:59)
-
StartThe lips (14:19)
-
StartCreating a shadow under the nose (10:20)
-
StartThe chin - stretching materials with low inventory (20:34)
-
StartExplanation of finishing touches prior to removing portrait from plastic (1:37)
-
StartIntroduction of materials for creating permanent substrate (2:24)
-
StartCreating the fiberglass/mesh substrate (7:57)
-
StartRemoving portrait from plastic (2:21)
-
StartMoving portrait to permanent fiberglass/mesh substrate (4:26)
-
StartWorking direct - the forehead (18:04)
-
StartThe hair (12:37)
-
StartThe shirt (15:25)
-
StartCompleting the neck (0:56)
-
StartFinishing options (3:32)
-
StartCutting out the portrait (6:28)
-
StartReinforcing the substrate and creating the hanging hardware system (5:55)
-
StartAffixing the hanging system and reinforcement layers (8:10)
-
StartFinishing touches (2:21)
-
StartThank you! (0:24)
-
StartBonus I - Small exterior wall installation (1:24)
-
StartBonus II - removing plate foot with hammer & hardie (1:33)