Understanding Light and Form in Representational Mosaics with Donna Van Hooser
Take the deep dive and learn how to add depth and dimension to your mosaic art with the interplay of light, shape, and surface
Enroll in Course
Are you eager to improve your ability to capture light and shadows in your mosaic art? Does the thought of creating realistic depth and form seem daunting? Where do you start? How do you choose values that bring highlights and shadows to life? And how do you cut stained glass to achieve the best shapes for the natural flow of andamento?
If these questions and more have been swirling around in your mind, you are in the right place!
Renowned mosaic artist Donna Van Hooser brings her deep dive into Understanding Light and Form in Representational Mosaics to Mosaic Arts Online.
Light and shadow are essential for creating depth, volume, and realism in mosaic art. In this course, Donna breaks down the interaction of light with surfaces, helping you understand how it defines shape and structure.
The course begins with a lecture-style presentation designed to sharpen your observational skills. You'll learn how to analyze complex visual information and simplify it into manageable pieces by observing Donna’s photographic examples.
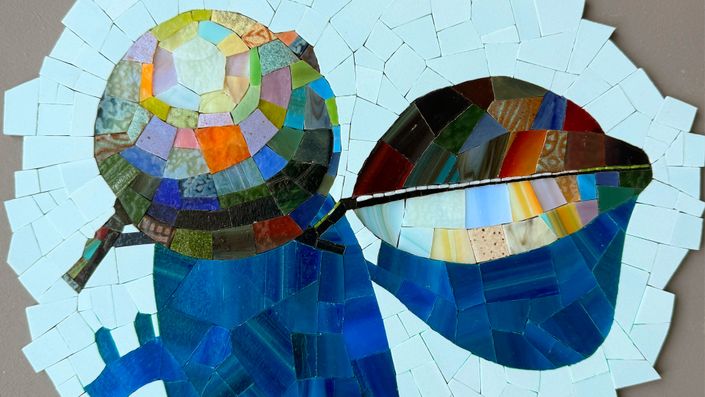
From there, you’ll dive in, watching Donna demonstrate her techniques on two separate mosaics, a still-life lime, and a dog’s eye, in her Color Freedom style.
Donna will demonstrate the dog's eye in an enlarged version to help you better see each color value and shape she chooses. There will be a PDF for download so you can follow along with creating your enlarged dog's eye for learning purposes.
In this course, you will also learn:
- How to choose stained glass colors based on the values that correspond with the image.
- Advanced cutting techniques to create precise tesserae for realistic shapes and shading.
- Strategic use of small tesserae to refine intricate details and subtle value shifts.
- The power of andamento—the movement of mosaic lines—to direct the viewer’s eye and enhance depth.
- Material selection strategies that incorporate different textures and values for shading and form.
- How to create a shadow in still life using stained glass
By the end of this course, you’ll have a deeper understanding of how to use mosaic tesserae to master light, shadow, and andamento, bringing depth and realism to your work.
Donna has provided a curated list of tools, materials, reference images, and handouts to support your learning.

Betty C.H.
Your Instructor

I began making mosaics while working as an artist for Hallmark Cards. With my background in illustration, I try to incorporate storytelling in my work using classical and whimsical elements. I learn and grow through experimentation and often find inspiration from the materials themselves.
While I have been making mosaics since about 1991, it wasn’t until I retired from Hallmark in 2015 that I have been able to work as a full time mosaic artist and instructor.
I love working in mosaic, especially dealing with the challenges and limitations of the materials. The glass must be carefully chosen from a limited palette, since colors cannot be mixed, and each piece must serve as an individual brush stroke working in harmony with the surrounding pieces.
Course Curriculum
-
StartIntro and personal interview with Donna and Tami (6:06)
-
StartCourse overview (0:46)
-
StartPDF for download. Tools, materials, and resources
-
StartReference images and handouts
-
StartObservation (2:30)
-
StartForm and Light (3:20)
-
StartShapes and shadows (2:21)
-
StartReflective light vs No Reflective Light (2:22)
-
StartSelecting an image for a mosaic (2:08)
-
StartWhere to start your mosaic (2:33)
-
StartAndamento: Donna's technique to create the form (2:49)
-
StartDrawing the andamento Part 1 (7:12)
-
StartDrawing the andamento Part 2 (7:49)
-
StartDrawing in the guide rows for a pet portrait (4:50)
-
StartGray scale values based on an image (3:49)
-
StartMapping the image (6:57)
-
StartIntro to tools and materials (5:09)
-
StartDEMO: Stained glass and tile cutting (4:30)
-
StartDEMO: Precision cutting stained glass (6:49)
-
StartArrange your stained glass and tiles by light to dark values as mosaic making begins (17:47)
-
StartSetting the transition color between light and dark values (11:56)
-
StartMoving into the shadow colors (15:59)
-
StartCompleting the lime (14:43)
-
StartLight side of the leaf (12:09)
-
StartDark side of the leaf (11:47)
-
StartChoosing the stained glass for the shadow and the background (1:39)
-
StartThe completed lime (0:28)
-
StartIntro to demo of The Dog's Eye (1:00)
-
StartAlways work from the center out; starting with the pupil (8:54)
-
StartChoosing the stained glass values for each part of the eye; starting to mosaic the iris (14:18)
-
StartCreating the reflected light in the eye; outlining the eye in dark values (12:22)
-
StartThe white of the eye (15:11)
-
StartThe corner of the eye (12:50)
-
StartThe outline of the eyelid (18:48)
-
StartThe fur surround (20:44)
-
StartThe considerations for selecting the stained glass to finish the eye (2:30)
-
StartReview and wrap up (0:54)