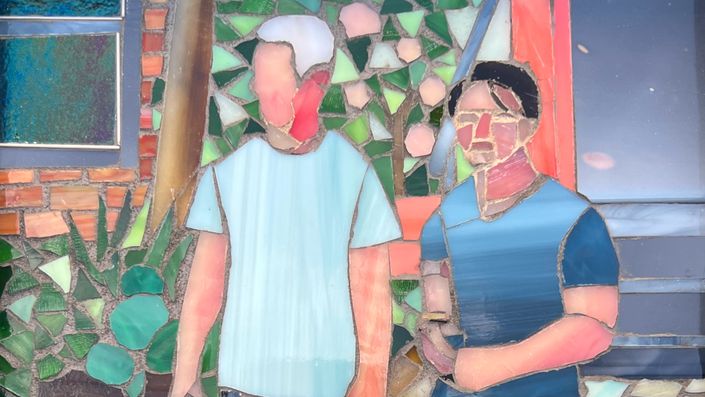
Fun Figurative Mosaics in Stained Glass with Shug Jones
Bring Figures to Life in Stained Glass – Learn Expressive Mosaic Art Techniques Anyone Can Do!
Enroll in Course
How much do you love working with stained glass in your mosaic art? Is it your favorite material to cut, shape, and manipulate into unique mosaic art designs?
Now, imagine taking your skills to the next level—learning to transform stained glass into expressive human figures and life-like backgrounds. That’s exactly what you’ll experience in Fun Figurative Mosaics in Stained Glass with Shug Jones.
Shug is a master at creating figurative stained glass mosaics, and now, for the first time, she’s sharing her entire process with you.
If you ever wished you could be a fly on the wall in her studio, watching each precise cut and seeing an image come to life, now is your chance.
This is an incredible opportunity to learn and follow along step by step, whether you recreate the piece she makes in this course or bring your own vision to the project.
What you will learn throughout this course:
✅ How to choose the best image for a mosaic
✅ Techniques to enlarge, trace, and transfer your image to the substrate
✅ Selecting the perfect stained glass palette
✅ Identifying glass with ideal gradations, transitions, and contrasts
✅ Two unique face-making techniques
✅ Using a single piece of glass to create folds and creases
✅ Creating depth and perspective by cutting specific shapes of the glass
✅ Shug’s signature two-color grouting method
By the end of this course, you'll have mastered valuable techniques and insider tips Shug uses in her mosaic artwork. Not only will you gain repeatable skills, but you'll also build the confidence to develop your own distinctive style in figurative stained glass mosaics.
Shug shares her favorite tools, materials, and resources for this course. She has also included the image she uses in this course for download.

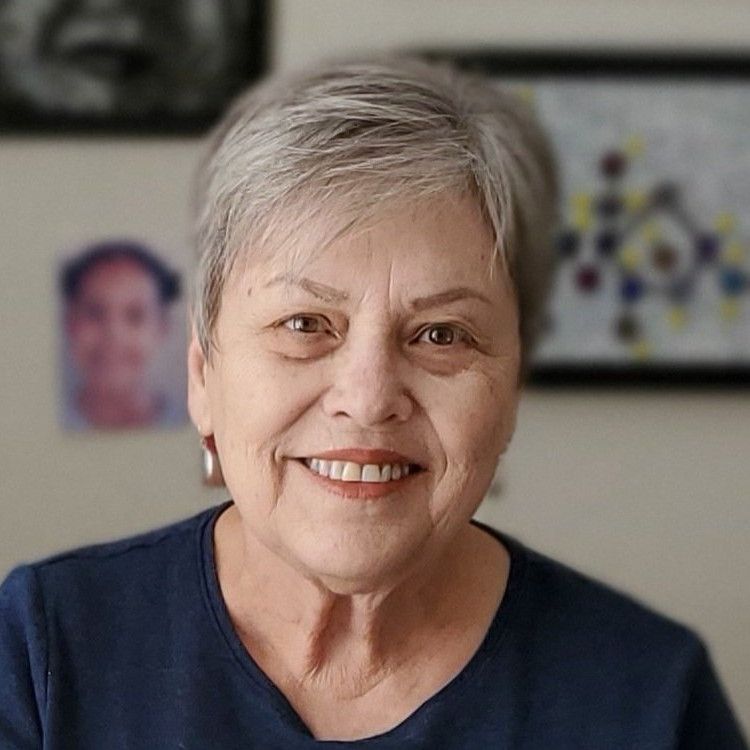
Jacalyn C.
Your Instructor

Shug Jones, a seventh generation Texan, is from North Texas, where she returned after living several years in Southeast Asia and Europe with her Navy husband. These experiences plus her continued travel have greatly inspired and influenced her mosaics. While she occasionally works abstractly with smalti and stone, her love of stained glass draws her to create photo-realistic art that concentrates on her observance of people around her and their interactions with others.
ARTIST'S STATEMENT
I have worked in many media over the years—graphite, ink, colored pencil, oil, watercolor, and even scratchboard. They all have their place in my repertoire of art supplies. Today, however, I choose to use tactile materials, such as glass, stone, porcelain, and beads to make my art.
It is the textures and the colors that draw me in—the need to create something that moves, converses with, and surprises the viewer. I love the challenge of combining the colored tesserae in such a way as to create a color entirely different, the process of gluing thousands of tiny pieces of glass to a surface that when viewed from a distance becomes a realistic image.
Mosaic has broadened my view of what art is. It has given me the desire to go beyond the two-dimensional surface and seek the third dimension. It has opened my eyes to possibilities that I never knew existed and abilities I never knew were there inside me.
In 2018, I began a series of works I call Mosaic Photographs. They are based on images that I capture on my frequent travels in the U.S. and abroad. Primarily figurative and architectural in nature, they are meant to be viewed as one would a normal photograph.
The realism in my work is achieved by using value, color, and perspective. Preferring to use stained glass in most of my work, I find that the variety of glass, the swirls, the texture, the colors, lends itself to my needs. Identifying that just right area of the perfect glass to create the fabric of a pair of pants or to represent the shadow on a face is a challenge that I readily accept.
Most recently, I have worked to develop a substrate that is very thin and rigid while appearing flexible like a sheet of photographic paper to advance the appearance of my work to reach my goal. A mosaic photograph, a moment in time.
Course Curriculum
-
StartIntro and personal interview with Shug and Tami (7:36)
-
StartPDF for download. Suggested tools, materials, and resources
-
StartImage for download.
-
StartCourse Overview (0:30)
-
StartMaterials tour (1:10)
-
StartPreparing the substrate: Part 1 (Mixing the mortar and admix) (2:27)
-
StartPreparing Substrate: Part 2 (Adding the hanging hardware) (4:20)
-
StartPreparing the Substrate: Part 3 (Spreading the mortar/thin set on the Schluter/Kerdi board) (3:07)
-
StartComparison of Schluter/Kerdi Board and Wedi Board as the substrate (1:08)
-
StartTrace your image once you have enlarged your image with a proportional scale. (6:55)
-
StartTransfer your image to the substrate (6:18)
-
StartReview your transfer once it's complete. (0:38)
-
StartSelecting your stained glass color palette (4:55)
-
StartBegin creating your mosaic. Always start with the face (19:39)
-
StartMoving on to the hair of figure one (11:45)
-
StartReviewing arms and hands. Second figure mosaic face (27:29)
-
StartHair on second figure (9:02)
-
StartHow to create templates/patterns for figure two's upper body skin (41:45)
-
StartHow to mosaic the legs of figure two (12:05)
-
StartMosaicking the shirt of figure one (17:19)
-
StartShug shows how she adds her signature before moving on to figure one's pants (22:32)
-
StartReviewing the darks and highlights of figure one's pants. Moving on to shoes (21:24)
-
StartMoving on to the clothing of figure two (21:57)
-
StartCompleting the clothing for figure two (9:47)
-
StartHow to simplify the shoes for figure two (18:03)
-
StartBeginning to mosaic the background (13:47)
-
StartReview the highlights and shadows of the stairs. Continuing the background (19:29)
-
StartHonoring the perspective of the background window and tree (24:22)
-
StartAdding the bricks to the background wall. Choosing to edit out certain background elements (19:37)
-
StartApplying the curb at the correct perspective (14:40)
-
StartBackground foliage: Part 1 (18:04)
-
StartBackground foliage: Part 2 (9:14)
-
StartUnderstanding the perspective and shadows of the ground bricks. (18:53)
-
StartReviewing how to mosaic the ground bricks/pavers with the light and dark tones (27:54)
-
StartIntroduction to Shug's two color grouting technique (1:54)
-
StartTips and tricks for grouting the figurative mosaic (7:52)
-
StartApplying the first color of grout (8:42)
-
StartApplying the second color of grout (10:38)
-
StartOption to frame your Fun Figurative Mosaic in Stained Glass! Wrap up and Thank you! (1:18)