Reflections in Stained Glass Mosaics with Mary Driver
Learn many tips and tricks to create reflections in water using stained glass
Watch Promo Enroll in Course
Once in a while an artist comes along and creates a piece that you cannot look away from. Not only has Mary Driver created a piece like this in her online course, but Mary Driver is sharing her talent and knowledge with us!
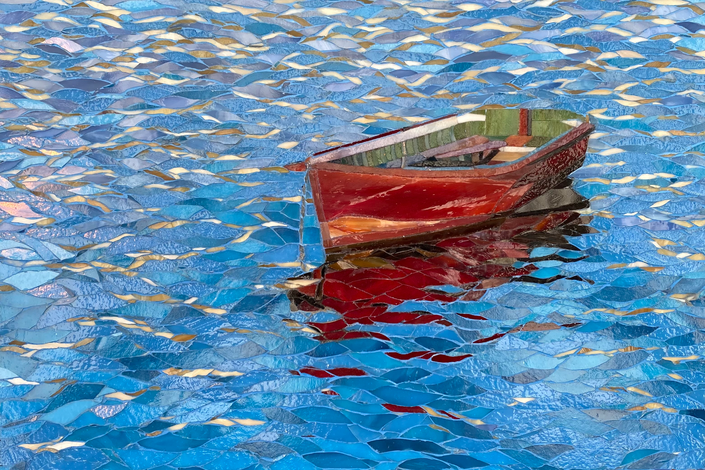
Mary captures reflections in stained glass mosaic art like no other. Her work shows how you can take big and small pieces of glass to create mosaics that look so incredibly close to the images she is portraying.
In this online course, Mary will break down the mystery of how to create reflections in stained glass using a simple color palette. Mary shares a wealth of talent and information in approximately 3 hours of detailed footage while creating an image of a simple boat floating in water.
In this course you will learn:
- How to choose the best photo image
- How to study your image
- Mary’s choice of substrate and tools
- Simple color theories involving the image and glass choices
- How to choose the stained glass
- How to cut stained glass with precision
- How to cut glass for water reflection
- How to cut glass pieces that nestle into each other for a water movement effect
- How to create balanced interstices
One of the benefits of this course and style of learning is watching Mary work in real time. You will learn as you watch from an “over hands” view as she makes choices in glass color, cutting, and placing each piece. Watch this course as often as you like at your pace, which is guaranteed to expand your knowledge and work as a mosaic artist.
Included in this course is a PDF for download of all the suggested tools, materials, and resources. Mary uses an electric grinder in this course but it is not a mandatory tool to do this technique.


Your Instructor

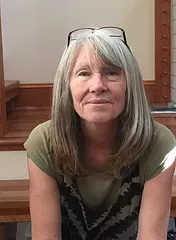
I was born into a family of artists. Both my mother and my sister were creative and talented in their mediums, the latter infuriatingly so. When you’re surrounded by that level of ability it’s easy to assume — as I did — that the artistic gene was somehow generation-skipping.
I started doing mosaics in about 2004, when my youngest child turned sixteen and could transport herself independently. It was the dawn of the empty-nest phase in our household and I found myself with a lot of time on my hands. A friend suggested I join her in taking a class from a well-regarded Mosaicist, Yulia Hanansen, who happened to have an mosaic studio in our town. That, as it turns out, was where my own artistic journey began in earnest.
When I look at the body of my work (not the really early stuff, mind you, you will not see those on this site), I see several themes. Clearly I am obsessed with water and reflectivity (or more specifically, with the effect of wind — or lack thereof — on water). I’ve had fun doing garden scenes and home/garden combos. Leaves, trees, and forests have been the focus of many of my pieces, as have various forms of wildlife, including ospreys, hawks, and owls, and, oddly, mice. Lately, mosaic portraiture has been a bit of an obsession. Then there are the idiosyncratic pieces that really don’t fit into any category. Every now and then I switch to making stained glass panels, a nice break which enables me to keep my glass cutting skills in top form (and helps me justify having a cool ring saw.)
Over time I’ve learned to pay much more attention to light and shadow, and I believe it has made a notable difference in the evolution of my work. It certainly has helped me understand better how to achieve photo-realism in mosaic.
Finally, yes, I do take commissions, and I also donate some of my pieces to benefit various nonprofits. If either of these interests you, please don’t hesitate to contact me.
Course Curriculum
-
StartIntro and personal interview with Mary and Tami (7:56)
-
StartPDF for download. Suggested tools, materials, and resources.
-
StartOverview of tools and materials (2:29)
-
StartOverview of water reflections in Mary's work (1:49)
-
StartLegal use of images (0:43)
-
StartChoosing the best photo image (1:07)
-
StartChoosing your substrate (1:41)
-
StartHow to prepare your substrate (2:35)
-
StartPreparing to transfer your image (3:48)
-
StartTransferring the image (11:19)
-
StartAttention zones and capture details (3:03)
-
StartChoosing your stained glass palette (2:30)
-
StartOverview of tools and cutting the glass (5:04)
-
StartIntroduction to the grinder (1:50)
-
StartStarting to cut the glass (10:12)
-
StartCutting the glass with templates (6:10)
-
StartReviewing the progress of the mosaic (1:42)
-
StartCreating thin pieces of glass (2:59)
-
StartReview of the boat mosaic process (3:17)
-
StartCreating reflections of the boat (7:59)
-
StartTechnique for creating water effect (2:10)
-
StartCompleting the boat reflection (1:18)
-
StartAdding blue glass for the water (2:11)
-
StartAdding different values of blue glass (10:35)
-
StartMaking adjustments with glass color choices (10:30)
-
StartWatching Mary work (11:00)
-
StartTiny details making a difference (8:31)
-
StartIntroducing a lighter blue value for more dimension (10:19)
-
StartLearn as you watch Mary work (14:22)
-
StartContinuing to study the photo for changes in the reflections (10:19)
-
StartUsing different size pieces of glass for more depth and dimension (10:19)
-
StartMary discusses grout options (1:20)
-
StartWrap Up and Completed Piece (0:58)
-
StartBONUS: A study of Mary's work (5:09)